Vanilla Lotion Bars
- Apr 26
- 2 min read
Updated: May 2
Parent Note: This craft is a little more expensive to make but it is easy and super fun.
Check for tree nut allergies before deciding upon this craft.
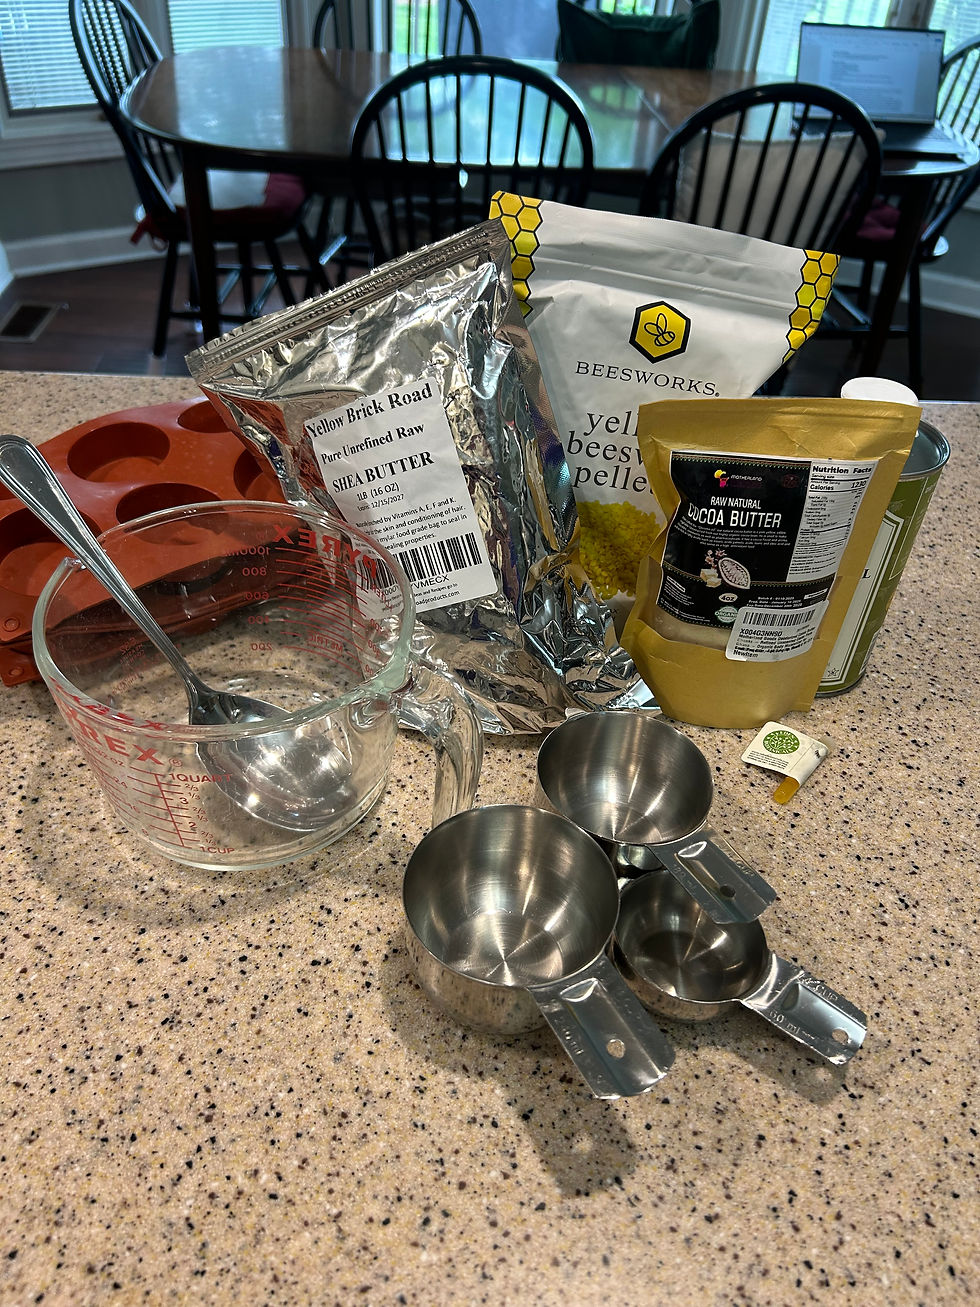
What You Need
3/4 cup raw, unrefined cocoa butter
1/4 cup raw, unrefined shea butter
1 cup coconut oil or sweet almond oil
1 cup beeswax pellets
1 teaspoon vanilla essential oil (oleoresin, this is different from vanilla extract)
Silicone molds
Parchment paper bakery bags or metal tins a little larger than the size of your mold
What You Do
Before the session, clean the work surface and bowls and utensils you will be using with isopropyl alcohol or a bleach-water solution. Have out all the ingredients you need, line the work surface with paper, and have a microwave available.
Place 1 cup beeswax pellets and 1 cup coconut or sweet almond oil in a large, microwave-safe glass measuring cup. Microwave for 30 second bursts. Remove and stir the mixture for 1 minute between each burst until the beeswax is completely melted. This will probably take 2 to 4 minutes. Do not boil the mixture; heat just enough to completely melt the beeswax. TIP: Do NOT put all ingredients into the microwave to melt together, because the shea butter and cocoa butter will crystallize if they get too hot. Always melt the beeswax and liquid oil together first.
Place 3/4 cup cocoa butter pieces/pellets into this mixture and stir until it is melted. This may take several minutes. Place in the microwave for 30 more seconds if needed to melt the mixture thoroughly.
Stir the 1/4 cup shea butter into the melted oils and let it melt completely. This may take a few minutes.
Stir in 2 teaspoons vanilla essential oil. Note: the cocoa butter has a naturally chocolatey smell, so the vanilla blends well with the natural fragrances of other ingredients.
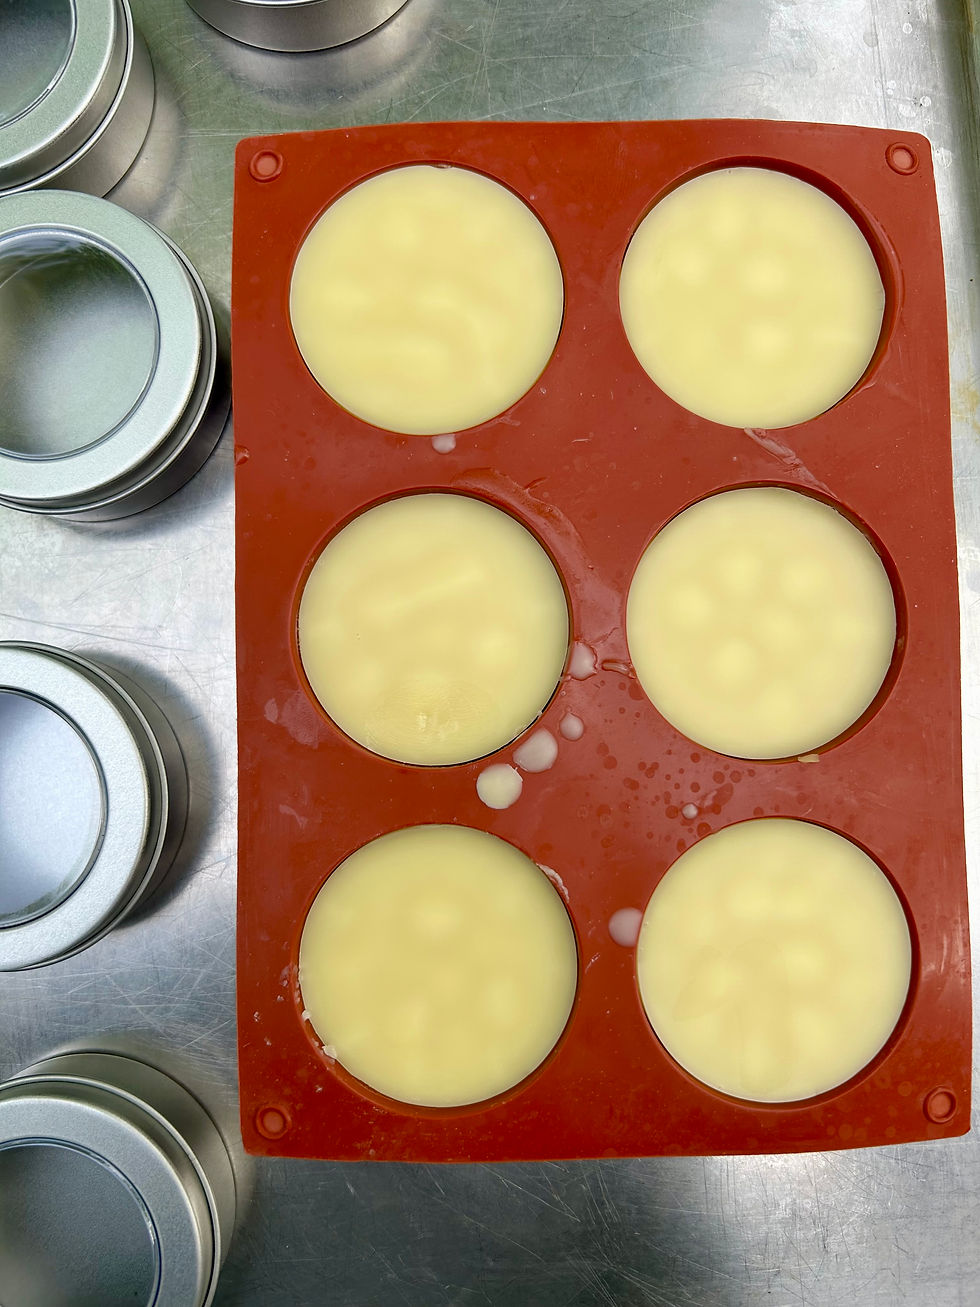
Have kids help you stir the mixture as you work and help you pour the melted mixture into the silicone molds, but use caution: the melted butters/oils are hot. As you pour the mixture into the silicone molds, try to fill them to just under the top line.
Allow the lotion bars to set up completely on a flat surface. The bar set up will take a few hours.
If desired, make a tag with these instructions on how to use the lotion bar: Hold the lotion bar in your cupped hands for a few seconds to warm it. Swipe it on the back of each hand then place back in the container. Rub the lotion in to your skin.


Comments